The Foam suit
The Iron Man foam suit build
This page is about the foam build stage of the project, check out the main project index for the rest.
I built the suit out of 10mm thick Plastazote LD45 foam. This is a high density foam which weighs 45KG per cubic metre. All the parts were cut with a knife and stuck together with hot glue. Plastazote can be shaped and stretched with heat, which helped a lot with the faceplate for instance. I used approx three 2x1metre sheets of foam for the whole suit. The Pepakura templates for this came from here: The RPF
Note that Plastazote also often called EVA foam, or at least is very similar to it. You can either buy the foam from a foam supplier, or use EVA foam floor mats, Yoga mats, and others.
There are some YouTube videos about this, or scroll down for pictures and words:

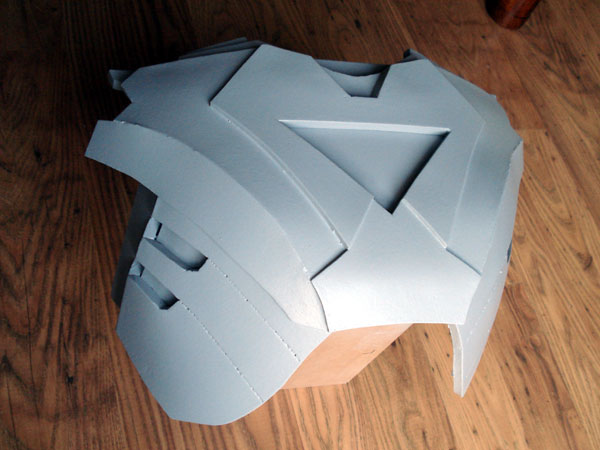
Here are some in progress pictures of the foam pieces, click for bigger versions. The template for each piece was modified from the Pepakura files as demonstrated in the videos above. I started with the helmet, although this isn’t the best advice if you haven’t built from foam before – probably best to start with a piece that has less tight corners/curves like the chest plate.


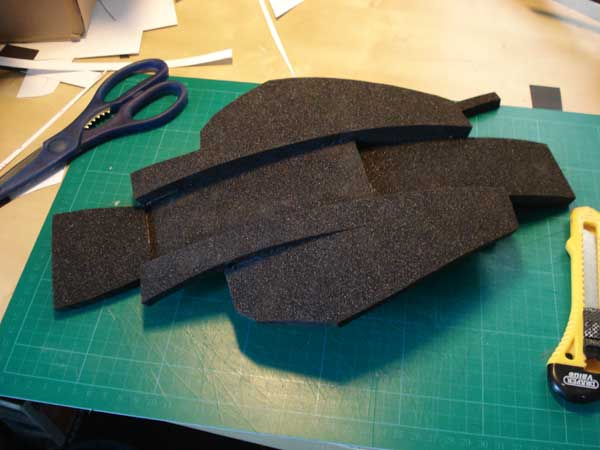
The details and lines in the pieces were made by staggering the edges of the foam, this is demonstrated in the second video above. I used a hot air gun to bend/stretch the curves in the foam, which you can see the most in the helmet, this reduces the need for so many custs/lines which you would need if the material would only bend in one direction like paper:


When the pieces were all made I sealed them PVA which I got from a local DIY store. This is ‘white glue’ / wood glue, it dries clear, so it makes the pieces look all shiny and nice, and also makes them a lot more rigid feeling:


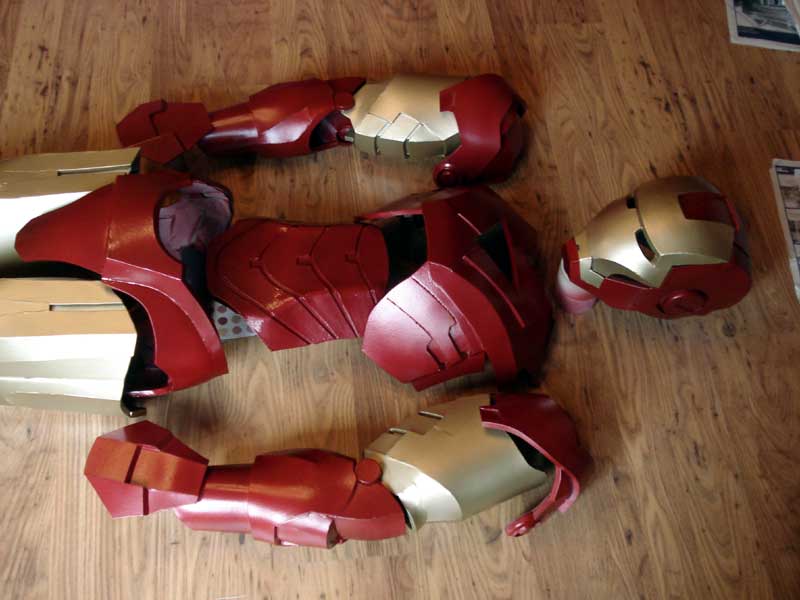
Here are some pictures of the upper body pieces once the PVA has dried, they look almost too good to paint:


I then continued, and made the whole suit. Again, I modified the Pepakura templates on paper and stretched in the curves, which is the only way to get builds with the fewest amount of cuts on the contoured parts – and also one of the great advantages of building with foam:


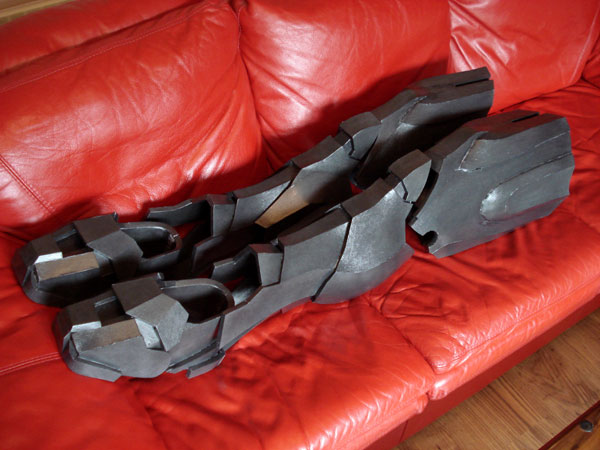
The legs and feet laid out;

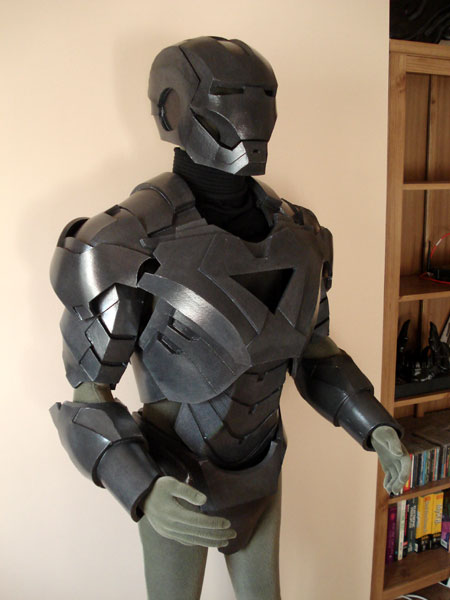
And the whole suit on my mannequin. The mannequin is too short for the suit, hence some of the pieces are bunched up, and the cod/pelvis plate requires some modification:


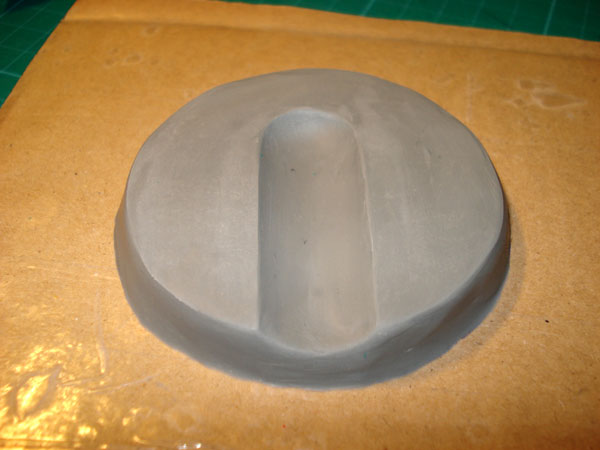
I made the detail parts for the ear and shoulder pivot by making sculpts from clay and bottle tops, then moulding and casting them in resin. Here are the sculpts:

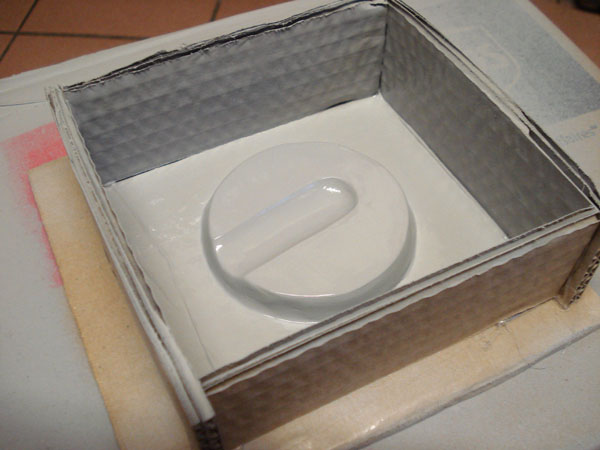
They are then placed into boxes and Silicone RTV is poured in to make a negative mould from the peices:
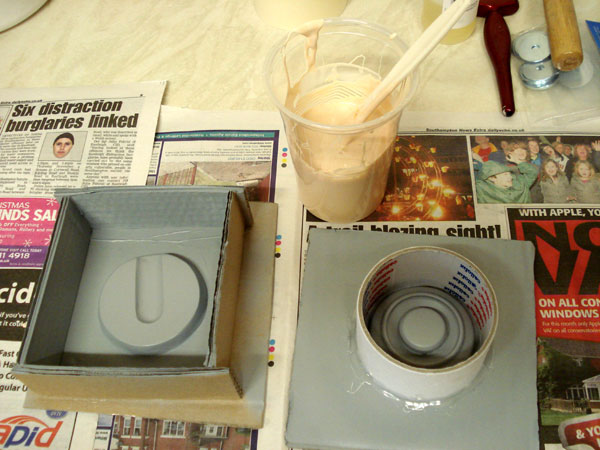

I used Smooth-on Polyurethane resin to cast the solid pieces, which can then be attached to the foam suit:


I then painted the suit, and through trial and error I found the best process was:
1. PVA as described above.
2. Spray with Plastidip liquid rubber.
3. Grey Plastic Primer, I used some from Halfords in the UK.
4. Your choice of car paint. I used Ford Solar Gold and Ford Regency Red, and Moondust Silver I think.
Important – I have now developed a plastic coating process for foam which is far superior, check it out here.


Here are the pieces painted without the plastic coating method. Here they have has the PVA, Plastidip, and grey primer applied:


And as you can see, here they are painted up with automotive paints:


The next part of the project was to make moulds from the suit and cast up a rigid version, you can see that in the main project index.
Related Posts


About The Author
James Bruton
My name is James Bruton, I live in Southampton, UK. Please note that this is my personal project website, I have no products for sale, most of the information is provided so that you can have a go yourself... Read More